PDF accessibility in Acrobat
Overview
This guide explains how to fix accessibility issues in Adobe Acrobat. Ideally, the PDF was generated from an accessible source document (see Creating accessible documents). If you don't have access to the source document you can resolve many issues in Acrobat.
Contents
Accessibility Checker
Acrobat has a built in Accessibility Checker which can help you find and fix issues. Some items (like color contrast) must be checked manually.
To run the Accessibility Checker follow these steps:
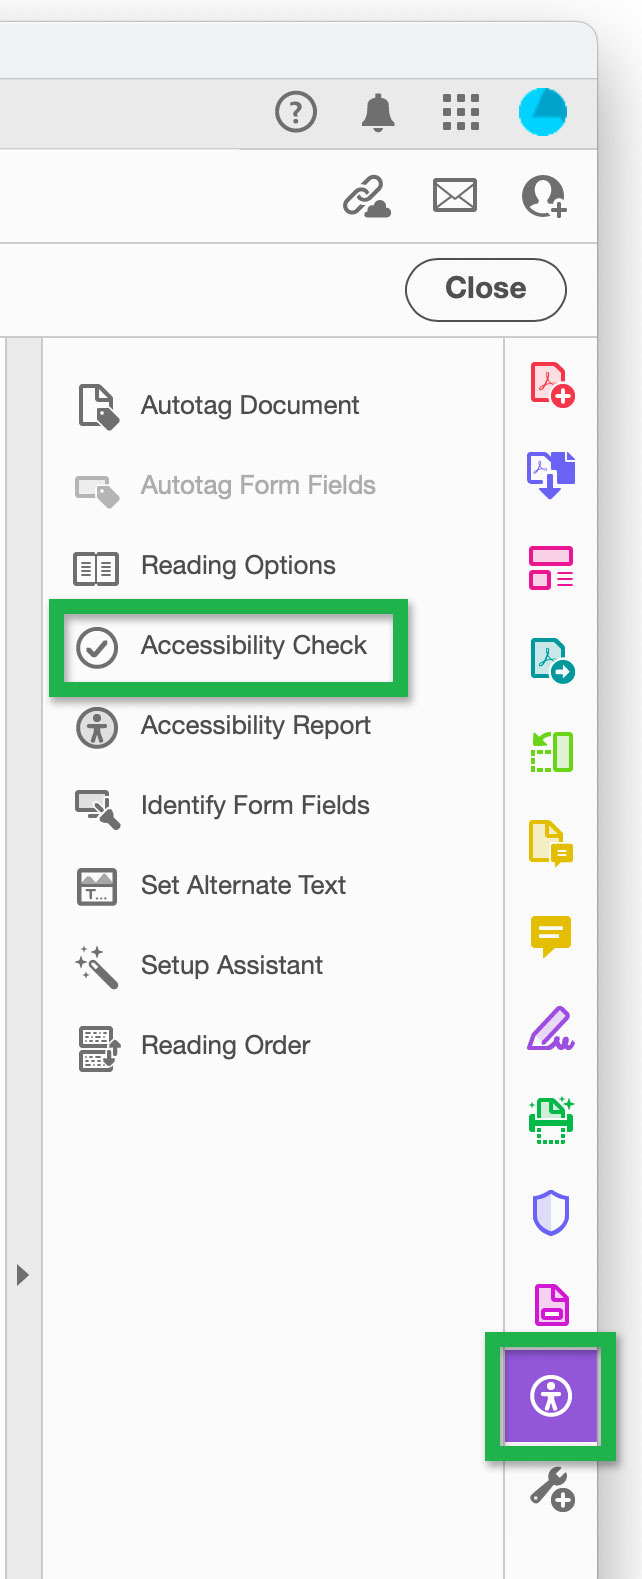
- Open the Accessibility tools found on the right-hand side of Acrobat and select Accessibility Check.

Screenshot showing the
Accessibility Check
option found in the
Accessibility tools. - This will open an Accessibility Checker Options window.
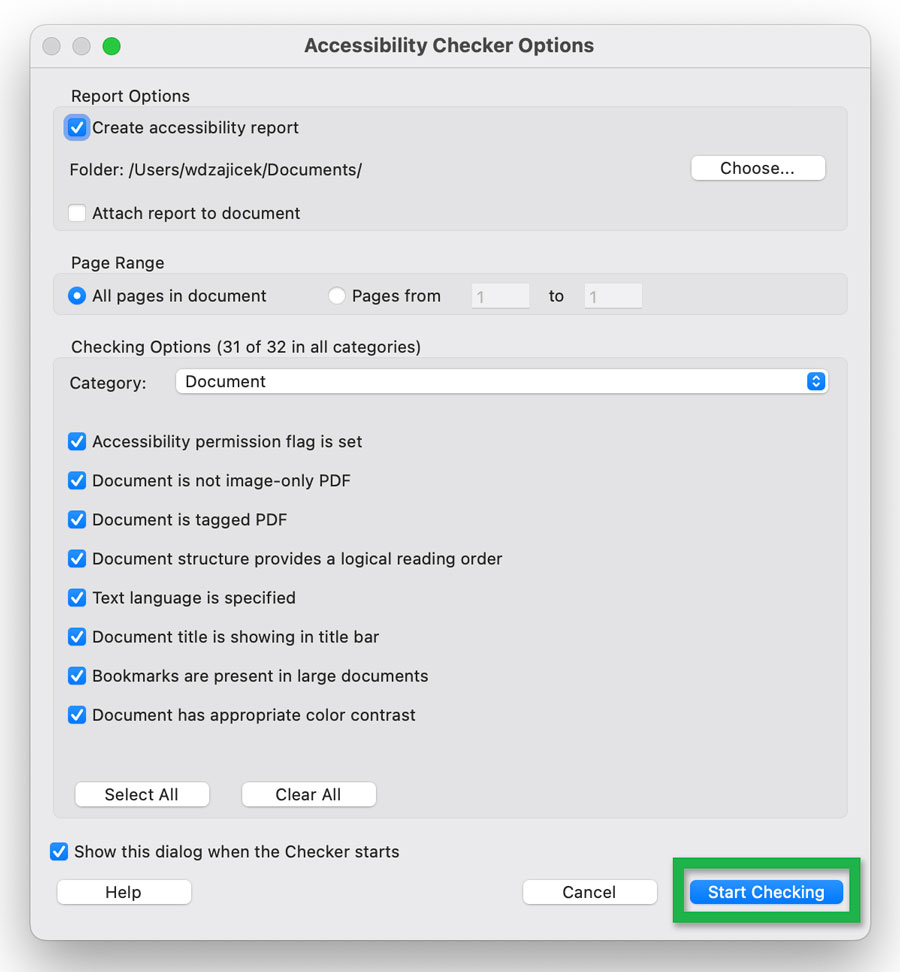
Use the Start Checking button with the default options.Screenshot showing the Accessibility Checker Options window. - Running the checker will open the results on the left-hand side of Acrobat.
Expand the results using the carrot symbols to see which items have passed and which have failed.Screenshot showing the
Accessibility Checker results.
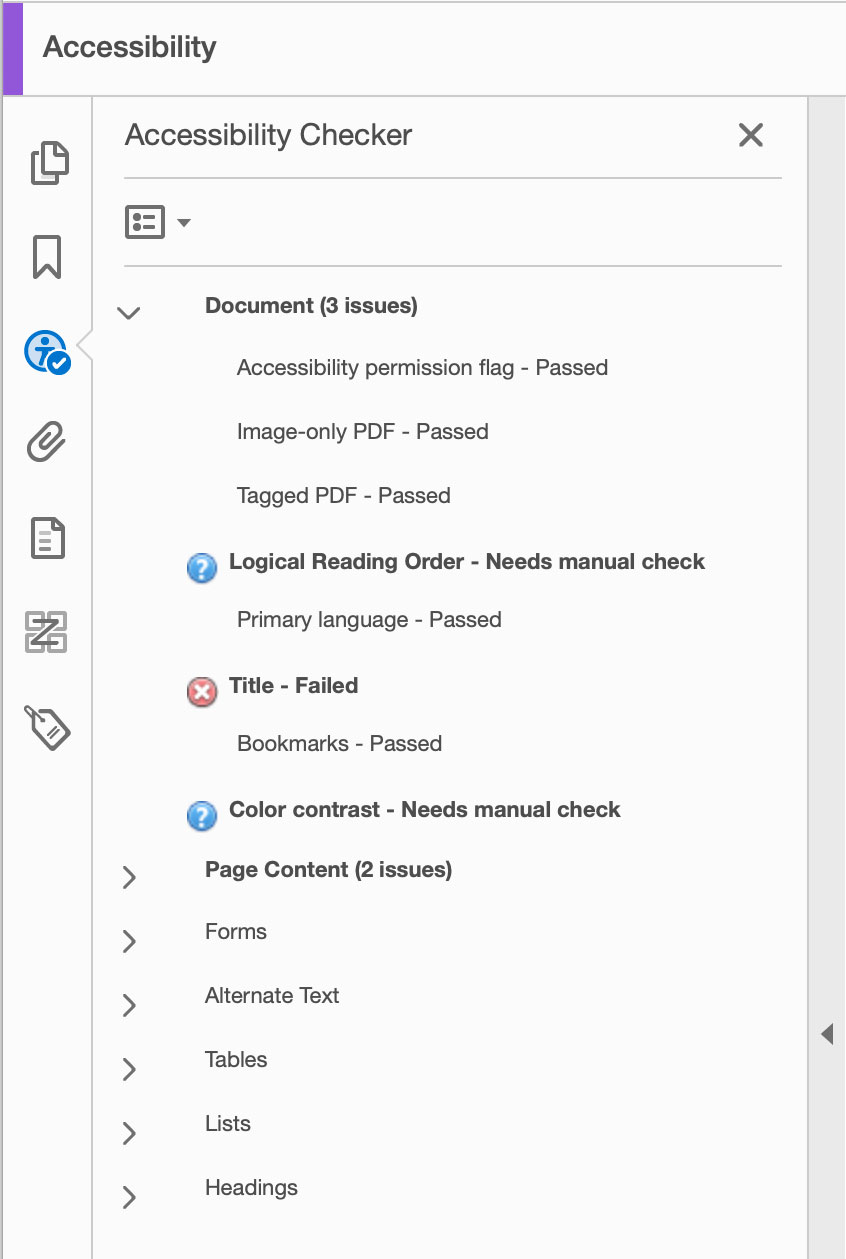
Some issues can be resolved directly in the Accessibility Checker results.
For example, if you see a Tab order - Failed issue, simply right-click it and select Fix from the menu.
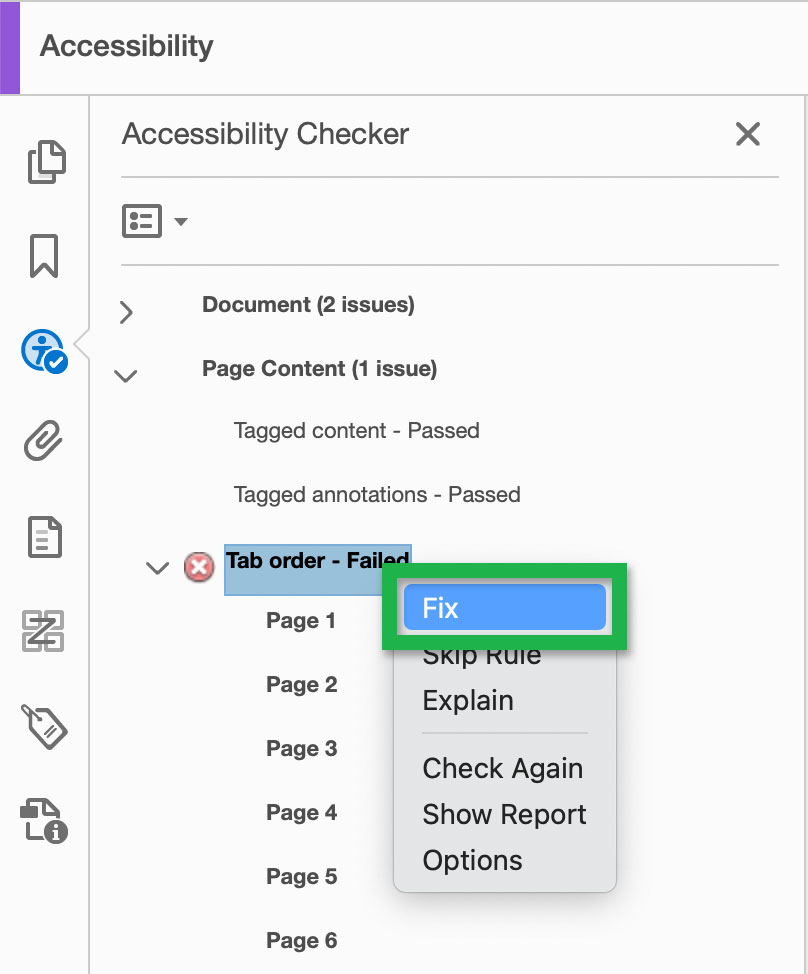
right clicking Tab order - Failed.
You can also right-click an issue and choose Explain which will open an Acrobat support page that offers an explanation of the issue an how to fix it.
Don't forget to save your file after fixing any accessibility issues.
Document title
A missing document title is one of the most common issues when evaluating PDF accessibility. The document title is what appears for users in search results. The title should be unique. For example, if there are a bunch of agenda PDF files that all have the title "Agenda" it will make finding a specific file very difficult. All of my search results will show the same title for each. Instead, a title like "Meeting Agenda for October 20, 2025" would be much more helpful.
When creating a PDF from a Word document, it's best to add the document title in the source file before generating the PDF.
Learn how to add document title to a word document.
A good indicator that there's a missing a title is seeing the filename at the top of an open PDF file.

at the top of an open PDF.
To add or adjust your document title in Adobe Acrobat, do the following:
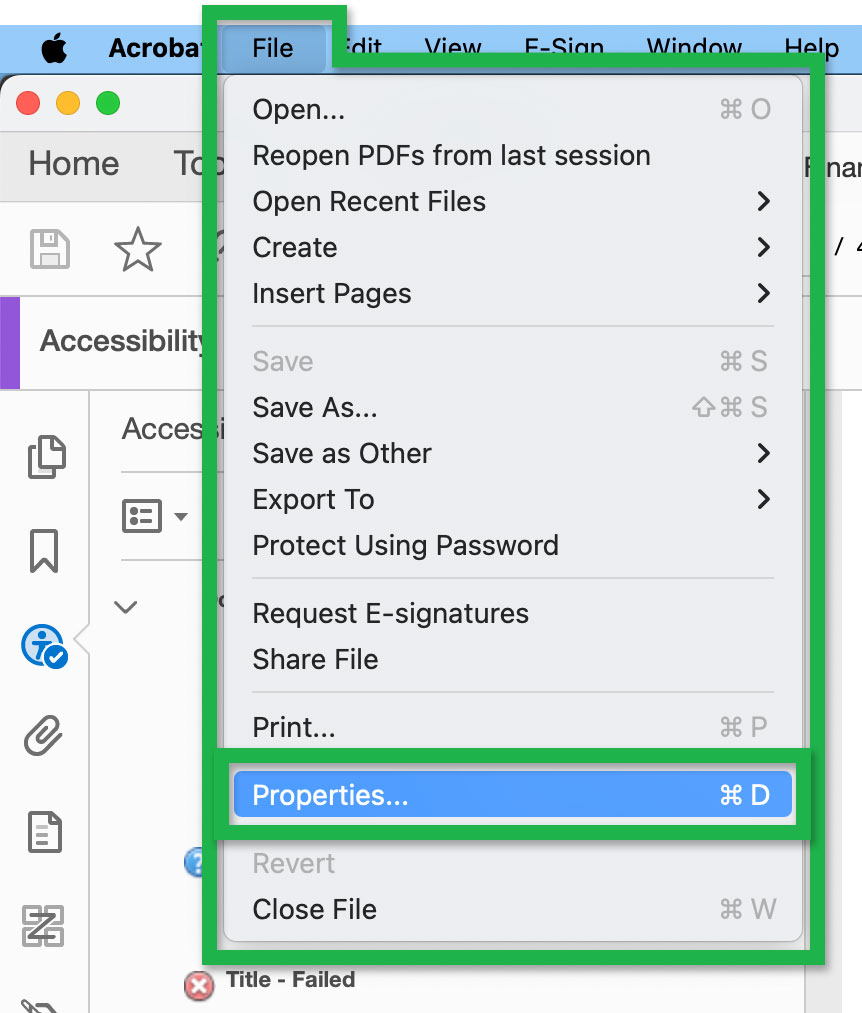
- Open the File menu and select Properties....
Screenshot showing the Properties... option
in the open File menu. - This will open the Document Properties window.
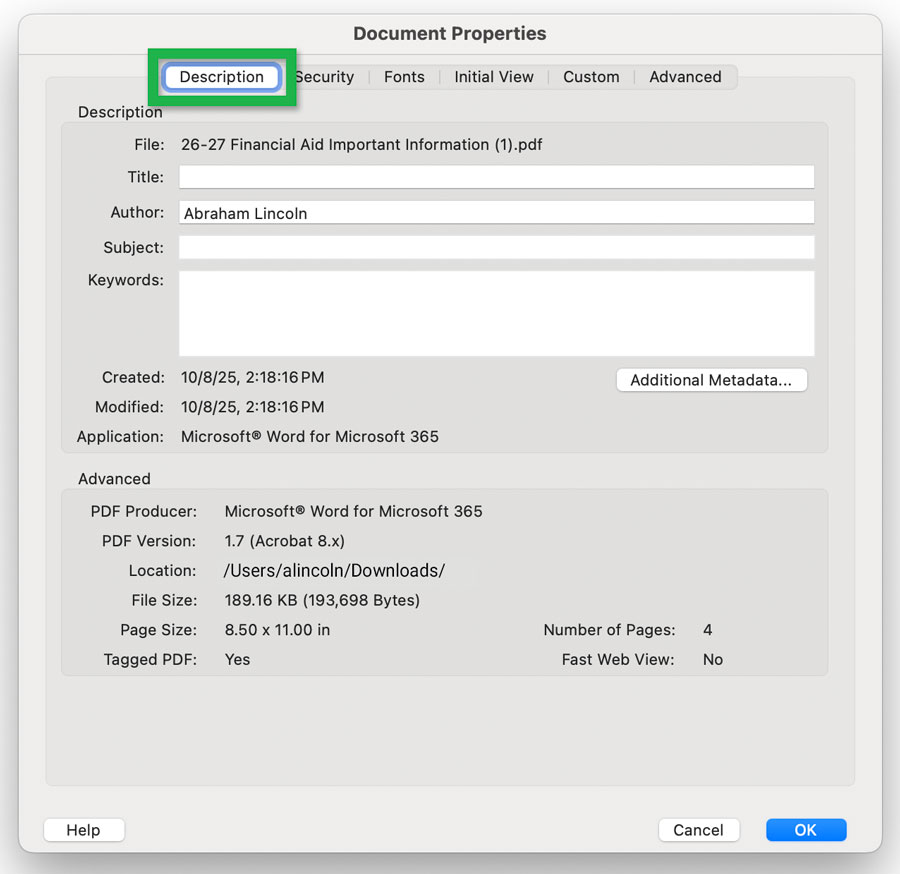
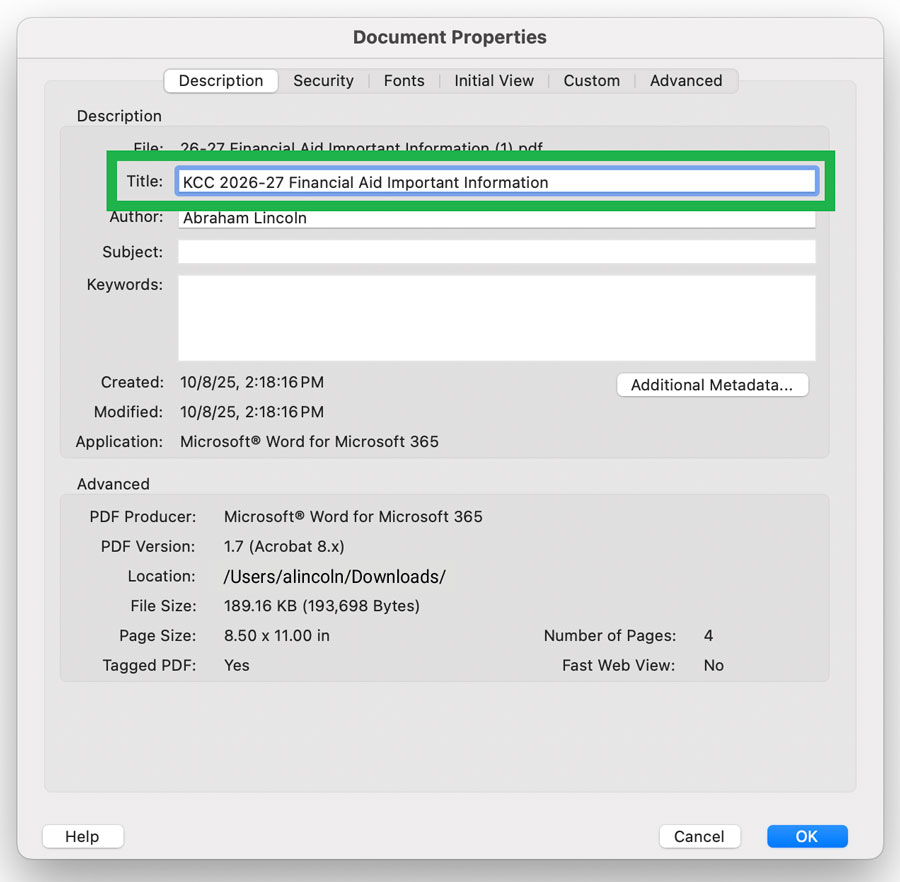
Select the Description tab.Screenshot showing the active Description tab
of the Document Properties window. - Enter a unique title in the Title field then use the OK button to commit your change.
Screenshot showing the active Description tab
of the Document Properties window. - Don't forget to save your file after modifying the document title.
Document language
PDF files also need a document language for accessibility.
When creating a PDF from a Word document, it's best to add the document language in the source file.
Learn how to add document language to a word document.
You can set or modify the document language in the Document Properties:
- Open the File menu and select Properties....
Screenshot showing the Properties... option
in the open File menu. - This will open the Document Properties window.
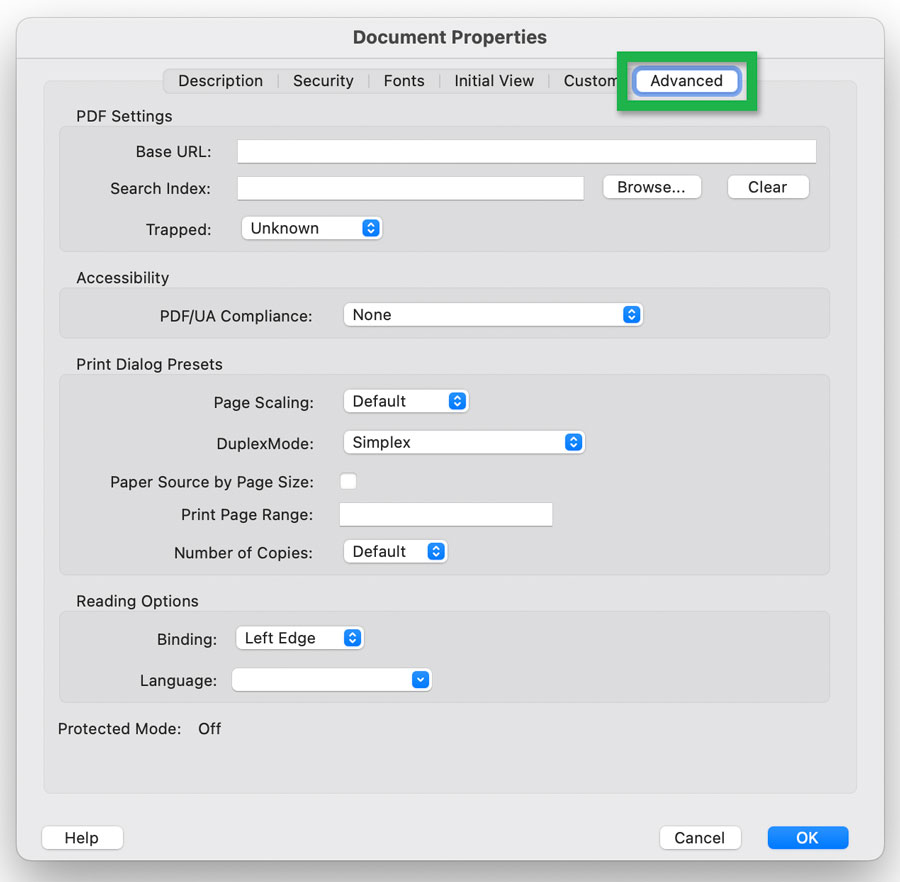
Open the Advanced tab.Screenshot showing the Advanced tab
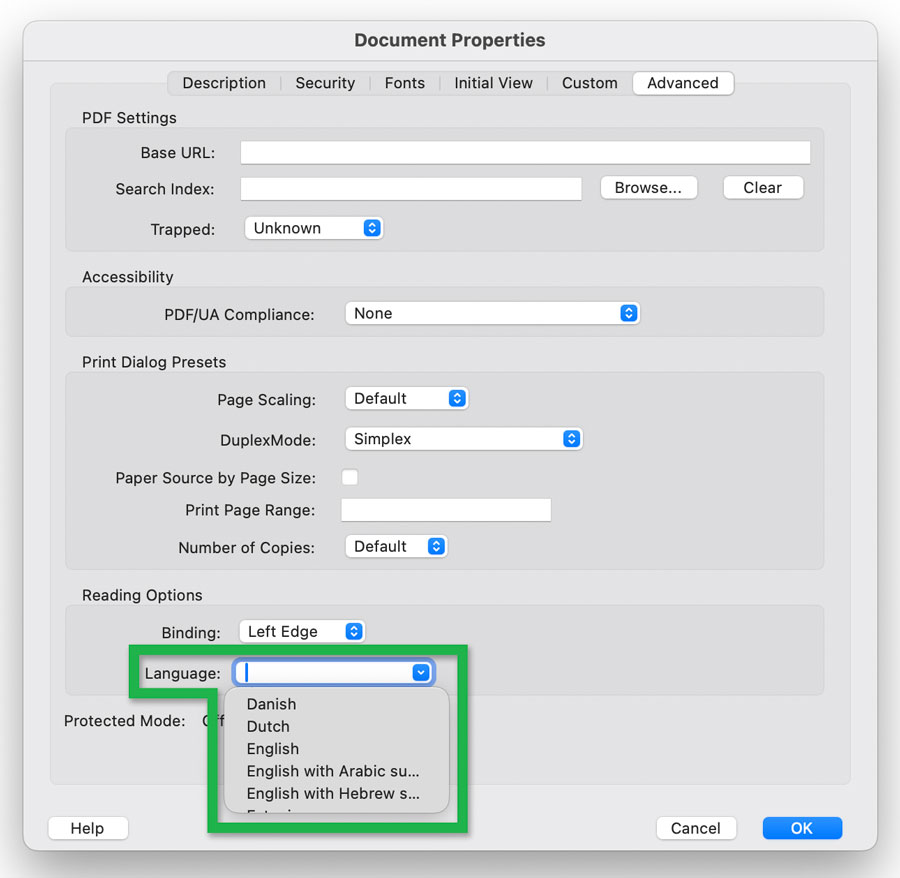
in the Document Properties window. - Use the Language field to specify the document language.
Either select the language from the dropdown menu or type into the field.Screenshot showing the Language field
in the Document Properties window. - Use the OK button to commit your change.
- Save your file after modifying the document language.